
This one celebrates one of my favorite picture books, THANK YOU, MR. FALKER by Patricia Polacco.
 |
For the cover I glued on a background of colorful card stock and then
decorated it with books and ABC's cut from a greeting card.
decorated it with books and ABC's cut from a greeting card.

I tried to capture the essence of the story by writing quick summaries.
Here I wrote on the flap that forms the bottom of the paper bag.
 |
I lifted the flap and wrote more on the inside of it.
I scanned this image of Trisha struggling to read, printed it out, and glued it on.
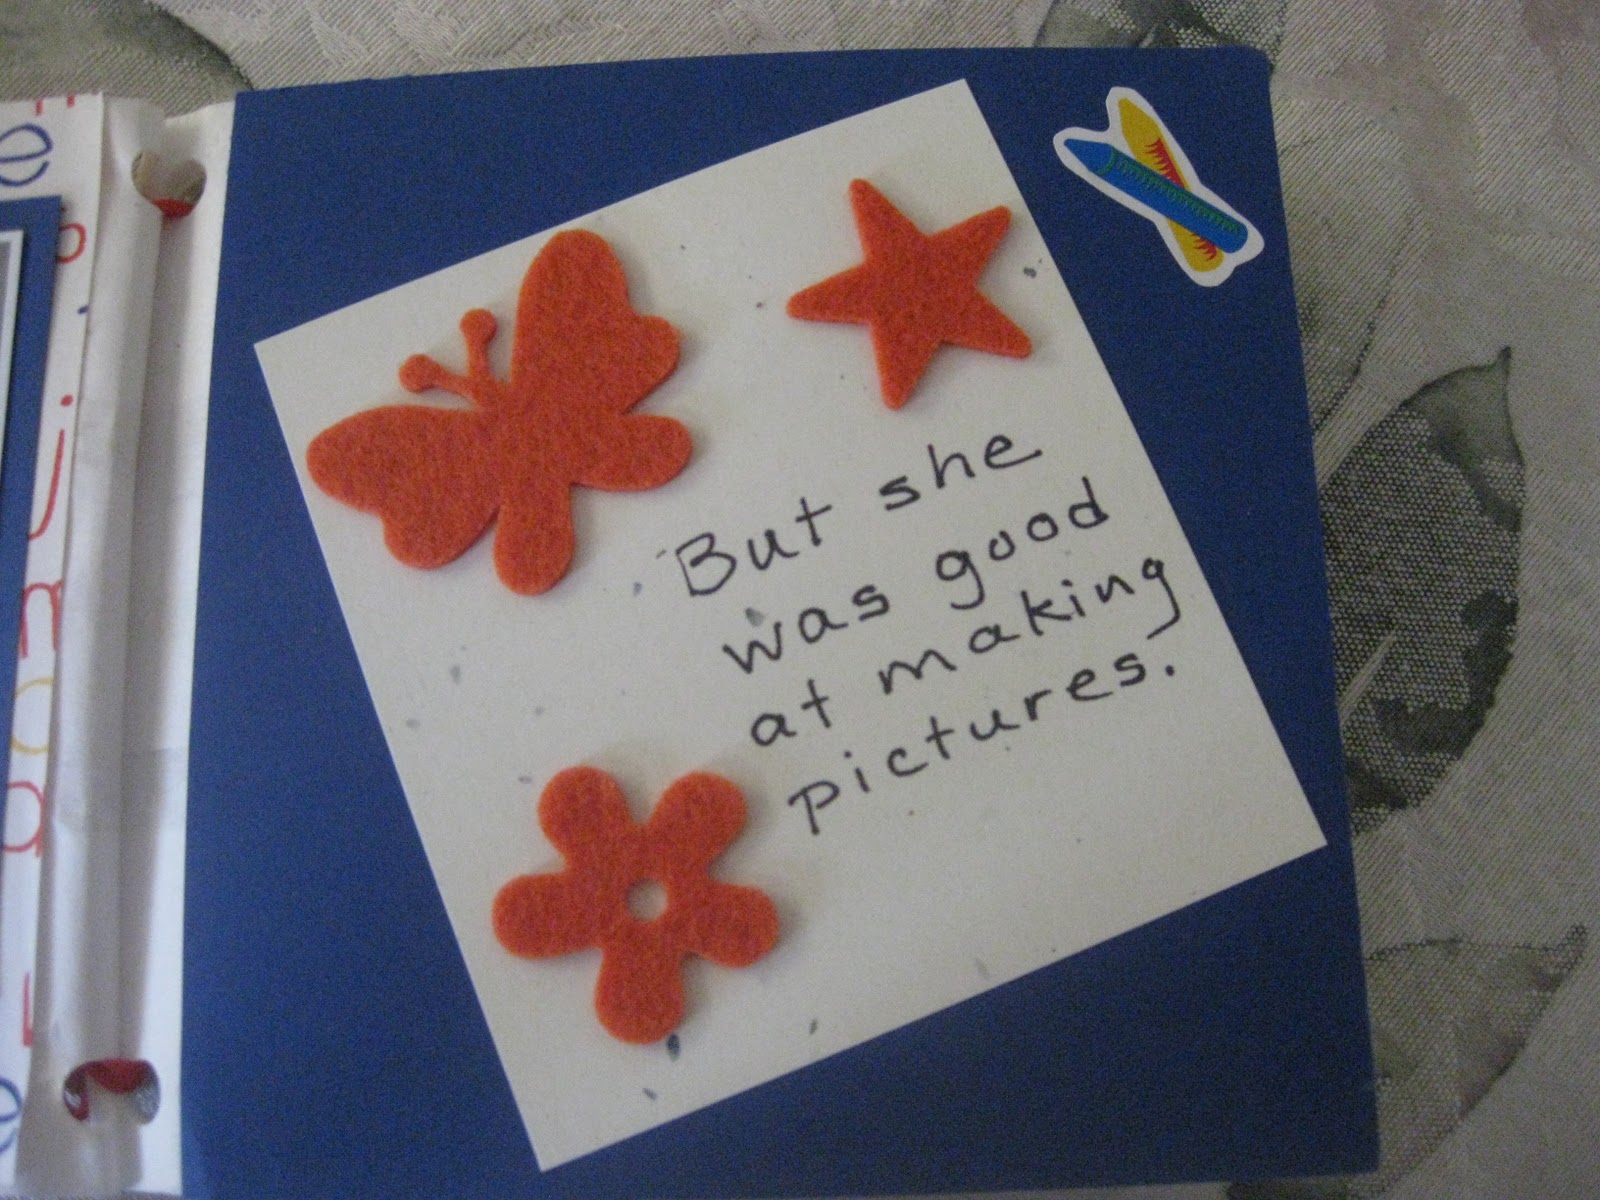
On this page I used stickers to celebrate Trisha's love of art.

This is the open end of on of the paper bag pages.
It makes a nice pocket to store items in.
It makes a nice pocket to store items in.

So, using scanned images, I created a collection of cards with major characters from the book.
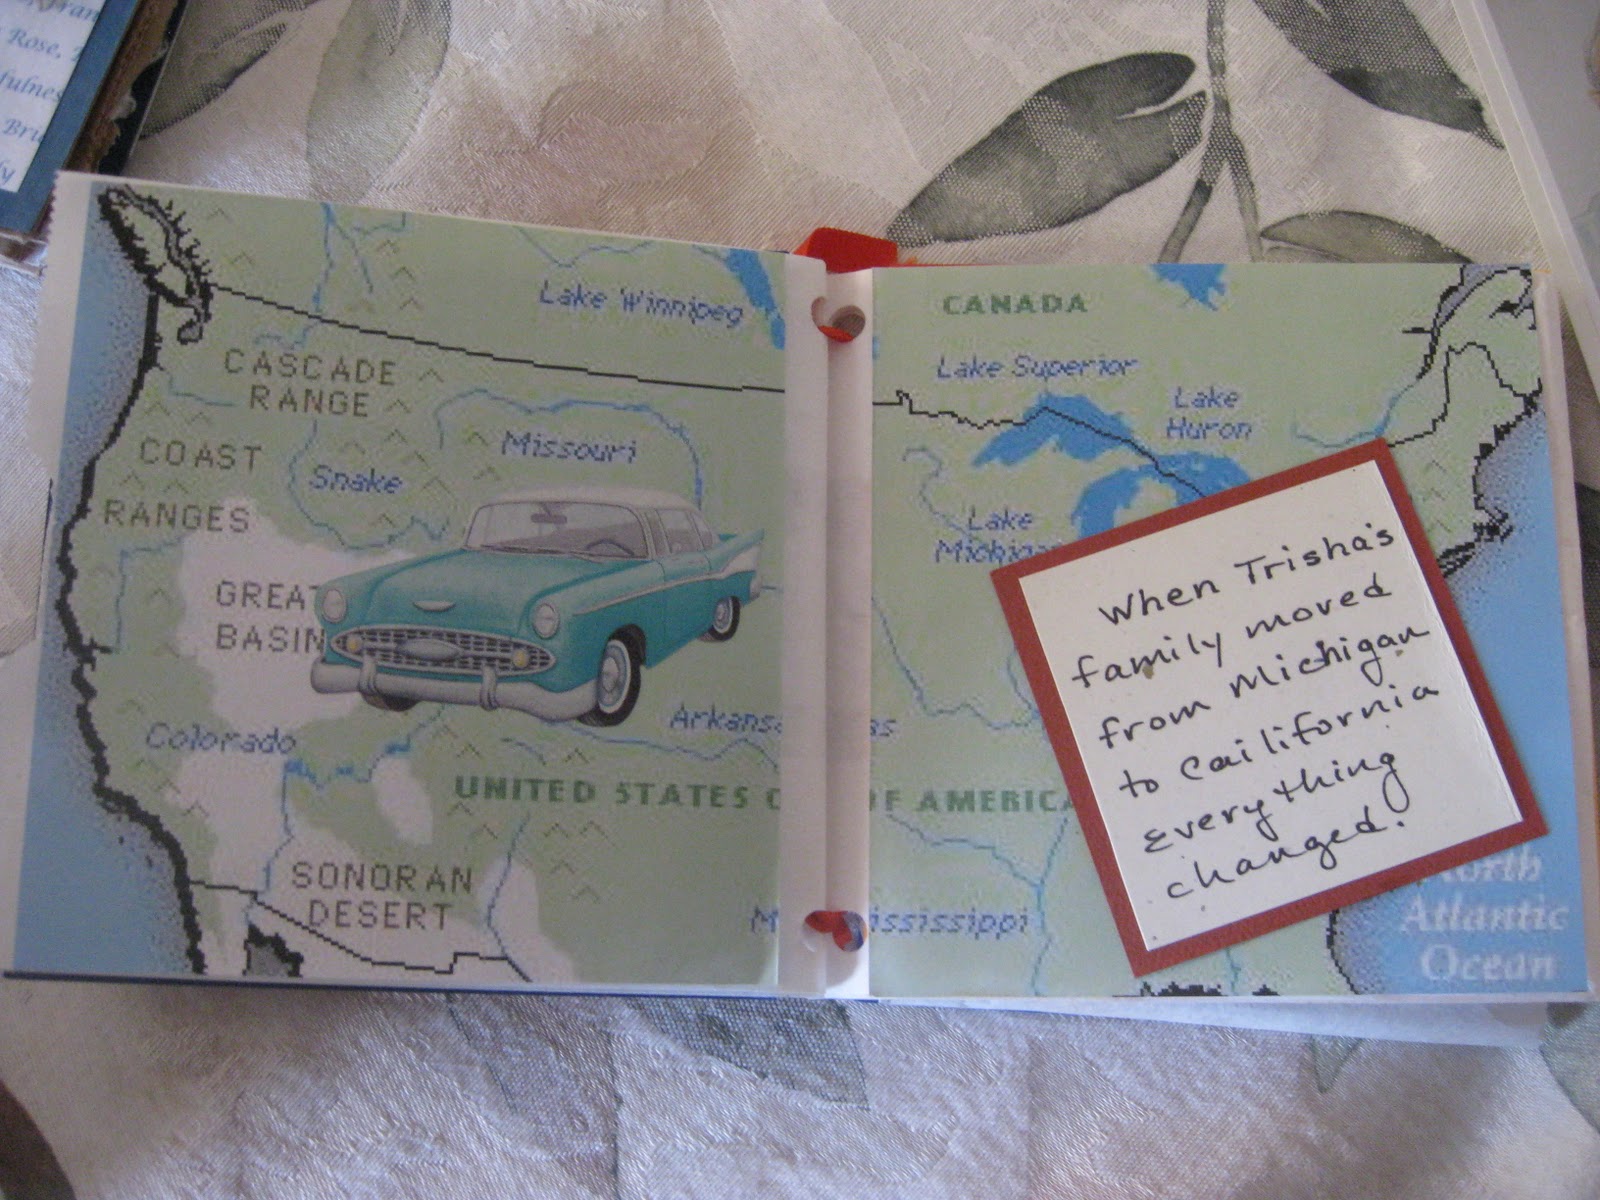
The center fold was a great place to create the big transitional
moment in the story when Trisha's family moved across the country and life changed forever.
I printed the map off some website, added a car sticker, and created the little sign with story line.
moment in the story when Trisha's family moved across the country and life changed forever.
I printed the map off some website, added a car sticker, and created the little sign with story line.

Mr. Falker was the teacher who helped her crack the reading code.

A second pocket created by the paper bag opening seemed like the perfect place to include the covers of some of Patricia's books.

I didn't want to create another card collection so I created this accordion fold booklet with scanned images of her book covers.

Here's how that looks when I spread it out. And these are just a few of her books!
Later in life, Trisha bumped into Mr. Falker and was able to tell him how far she had come.

On the back cover I included Patricia's final words to him.
See how easy that is! Ha! It actually took a lot of time.
But one can just as easily draw and write directly on the paper bags.
The beauty of this concept, is that it can be as simple or as complicated as the creator wants it to be.
Ready to give it a try?
___________________________
See how easy that is! Ha! It actually took a lot of time.
But one can just as easily draw and write directly on the paper bags.
The beauty of this concept, is that it can be as simple or as complicated as the creator wants it to be.
Ready to give it a try?
___________________________
PAPER BAG JOURNAL INSTRUCTIONS
The Paper Bag Journal is a great project for children, tweens, and teens. (adults too!) Just start with a few brown paper bags, (or any color) and you've got an inexpensive project with endless possibilities.
Instructions:
Place 2 paperbags on top of each other, alternating open ends. Then fold them in half and create your binding. (You can, of course, use more bags and if you prefer you can cut them so that the bottom of the bag is eliminated. But my example above makes use of the flaps.)
Options for paper bag binding:
- Eyelets or rivets
- Staples about 1/2 inch from fold
- Punch holes and tie with ribbons, fibers, or fabric strips. You can tie knots through each
hole or weave the ribon through the holes
The open end of each bag makes a wonderful pocket for journaling or more photos. Insert pictures or mementos into the open end of each bag. You can even create unique embellished pulltabs with ribbons or cardstock tabs.
Closed end (bottom) of the paper bag:
You have several choices for the closed end of each bag:
- Lift the flap and use it for more photos and journaling
- Cut a slit through the fold of the bag and insert a coordinating tag
- Trim the closed end of the bag so it opens just as the open end of the bag does.
- Cover the flap with paper or cardstock
NOTE: Paper bags are not acid free, so make sure to use duplicate photos only.
Here are a few links to Paperbag Tutorials. Note: These are not focused on student work and they use sophisticated techniques but they give you an idea of how the paper bag book is made. As you can see, there is more than one way to make a paperbag journal!)
http://www.youtube.com/watch?v=IAcsKl87Ryg (10 minutes)
http://www.youtube.com/watch?v=6Pnm-7OGakY&feature=related (9 minutes)
http://www.youtube.com/watch?v=MOvWNVoNnQ8&feature=related (7 minutes)